Step by step images tie shoes—a clear, visual guide that transforms the age-old chore of lacing into an effortless skill for all ages. Whether you're teaching little hands or refreshing your own technique, following easy image-based steps makes tying your shoes faster, more consistent, and less frustrating. In this article, we’ll break down the process using dynamic step-by-step images, so you can see exactly what to do—right down to knotting styles like the classic Ian Knot and easy bunny ears technique.
Tying your shoes correctly isn’t just about speed; it’s about securing laces tightly enough to keep your footwear in place—through lessons for kids and adults alike. When you focus on step by step images tie shoes, each motion becomes clearer. From bringing the lace segment over to forming secure loops, visuals eliminate guesswork and boost confidence, especially for beginners.
Why Step by Step Images Matter
- Visual clarity eliminates confusion in technique, especially for children learning the basics.
- Step-by-step images build muscle memory for consistent knotting.
- Images help compare different styles, like the simple box knot vs. the quick Ian Knot, so users swim easily between methods.
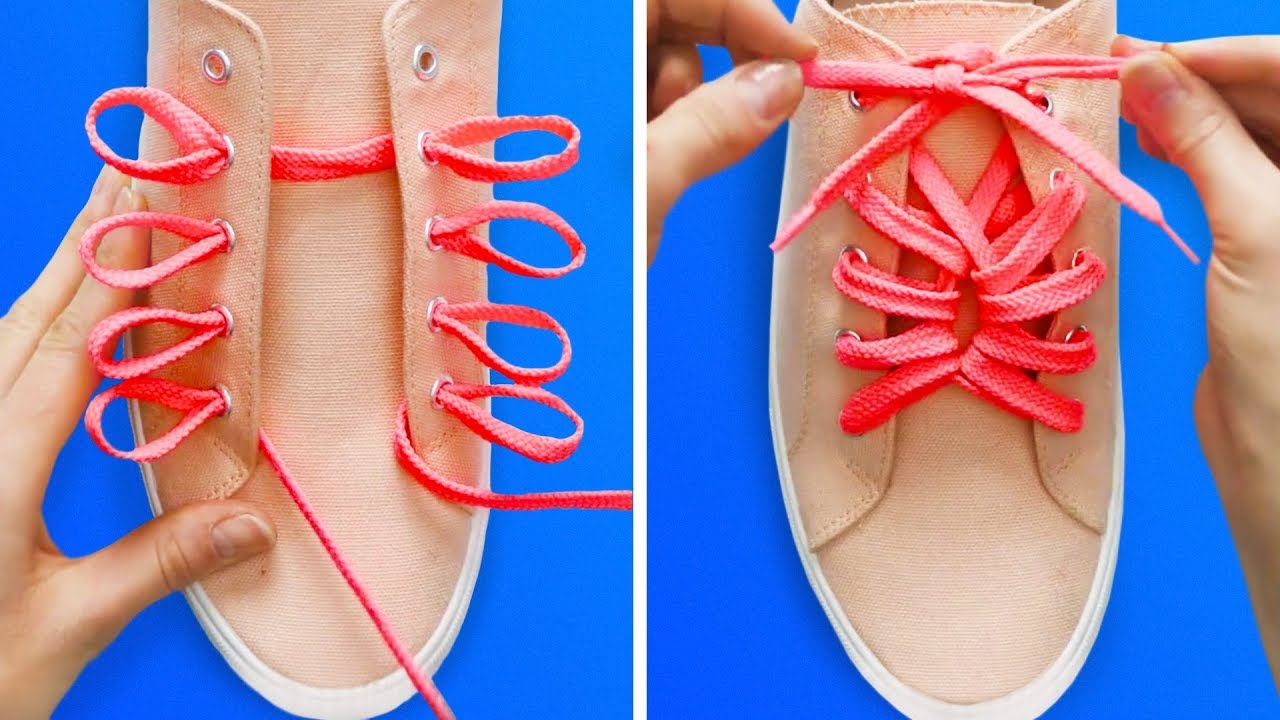
- Photo guides support different lacing patterns, from classic bar lacing to adventurous styles like the “Ian knot” or bunny ears.
How to Tie Your Shoes: A Clear Step-by-Step Guide with Images
Such details provide a deeper understanding and appreciation for Step By Step Images Tie Shoes.
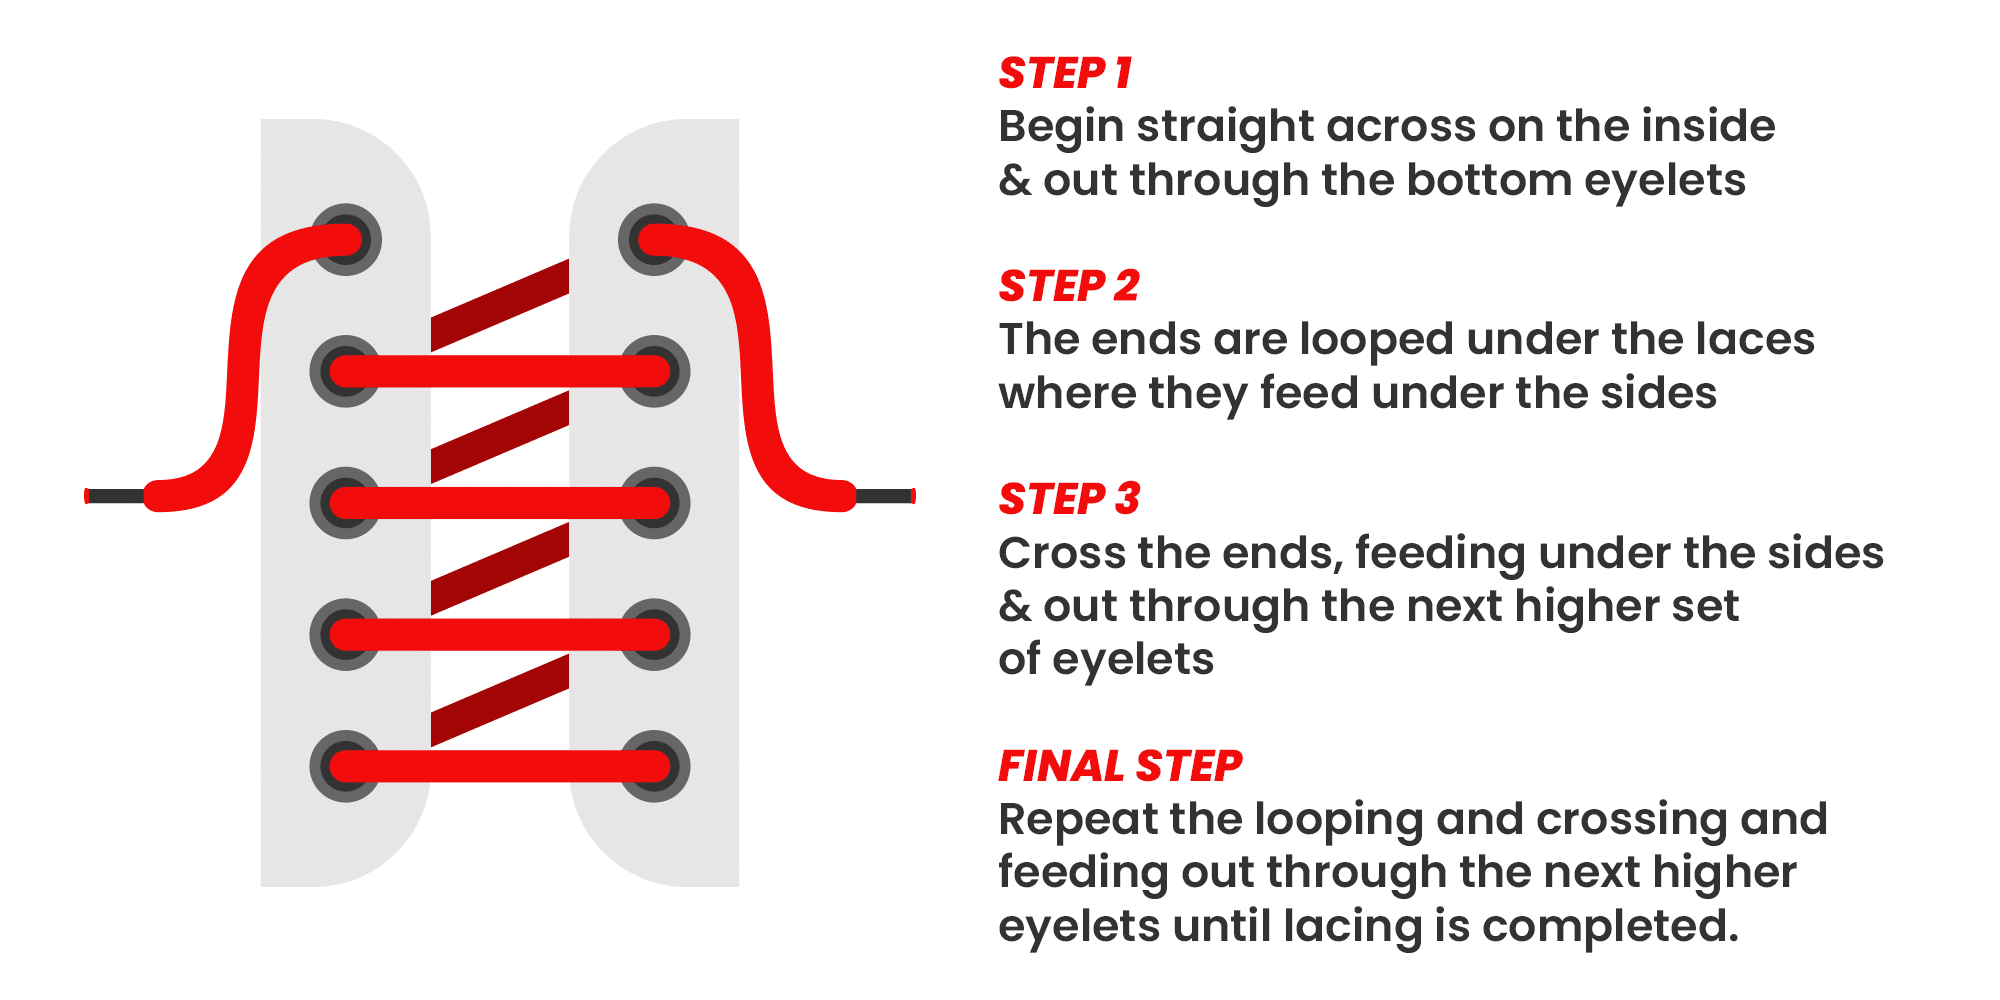
- Start with clean laces: Lay your shoe flat and center the eyelets. Hold left lace in your left hand and right lace in your right. Make sure both laces are even in length.
- Cross the laces: Bring the left lace over the right, then tuck it under and through the loop you just formed. Repeat with the right lace over the left and into the same loop. Now you have a loose over-under pattern—this is key to securing tightly.
- Form the initial loop: Gently pull both lace ends out to create a placeholder loop near the shoe’s tongue. This loop controls tension and sets the foundation.
- Wrap and tighten: Using one lace as a guide, wrap the other under and through the loop you made earlier. Pull carefully—don’t yank. The tightening motion secures the knot without skipping.
- Secure the final knot: Pull both lace ends firmly but smoothly. Wiggle gently to check stability. If loose, redo the double wrap before final tightening. A snug, neat knot keeps your laces from slipping all day.

 - Instructables")

")


 - wikiHow")

