Mastering the Milestone: Engaging Shoelace Tying Methods for Children
Learning how to tie shoelaces is an exciting and significant milestone in a child's journey towards independence. It's more than just securing footwear; it's a rite of passage that builds confidence, refines fine motor skills, and prepares them for countless adventures. If you've been searching for effective and fun shoelace tying methods for children, you've come to the right place! This article will explore popular techniques, offer expert tips, and guide you through making this learning experience enjoyable and stress-free.
Beyond the practical aspect of keeping shoes on, mastering shoelace tying offers numerous developmental benefits. It enhances bilateral coordination, requiring both hands to work together efficiently. It sharpens problem-solving skills, improves patience, and significantly boosts a child's sense of accomplishment and self-esteem. Encouraging children to learn these fundamental shoelace tying methods empowers them with a valuable life skill.
When Is the Ideal Time to Teach Shoelace Tying?
While experts often suggest that ages 4 to 6 are optimal for teaching children how to tie their shoelaces, readiness is more crucial than a specific age. Some children develop the necessary fine motor skills and cognitive understanding earlier, while others may need a bit more time. Look for signs such as your child being able to follow multi-step instructions, having good hand-eye coordination, and showing a genuine interest in learning. Don't rush the process; patience is key to success when exploring shoelace tying methods for children.
This particular example perfectly highlights why Shoelace Tying Methods For Children is so captivating.
Popular Shoelace Tying Methods for Children Made Easy
There isn't one "best" way to tie shoelaces; different methods resonate with different children. Here are some of the most widely taught and effective shoelace tying methods for children:
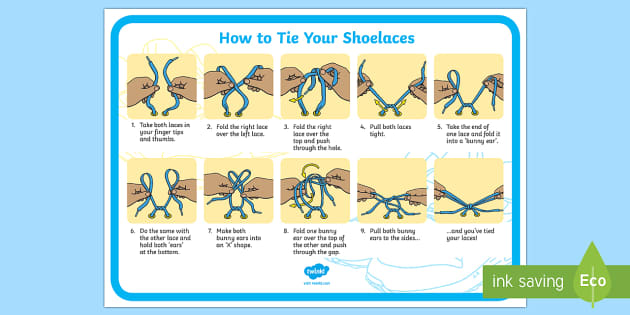
- Step 1: The Starting Knot. Begin by making a simple knot. Cross one shoelace over the other, tuck it underneath, and pull tight. This forms the secure base for your laces.
- Step 2: Create the "Ears." Take one shoelace and make a loop, just like a bunny ear. Hold it firmly between your thumb and forefinger. Repeat with the other shoelace, creating a second "ear."
- Step 3: Cross the Ears. Cross the two "bunny ears" over each other, forming an "X" shape.
- Step 4: Tuck and Pull. Take one of the bunny ears and tuck it underneath the "X" and through the hole created in the center. Pull both loops tightly at the same time.
- Step 5: Celebrate! You've just tied your shoes using one of the most beloved shoelace tying methods for children!
2. The "One Loop & Around" Method (The Squirrel Method)
Moving forward, it's essential to keep these visual contexts in mind when discussing Shoelace Tying Methods For Children.
This method can be a bit more challenging initially but often results in a tighter, more secure knot once mastered. It's sometimes called the "squirrel" method or the "tree" method. It's one of the excellent shoelace tying methods for children who are ready for a slightly more advanced technique.
Expert Tips for Teaching Shoelace Tying Methods for Children
Teaching a new skill requires patience, creativity, and a positive attitude. Here are some tips to make learning shoelace tying enjoyable and effective:
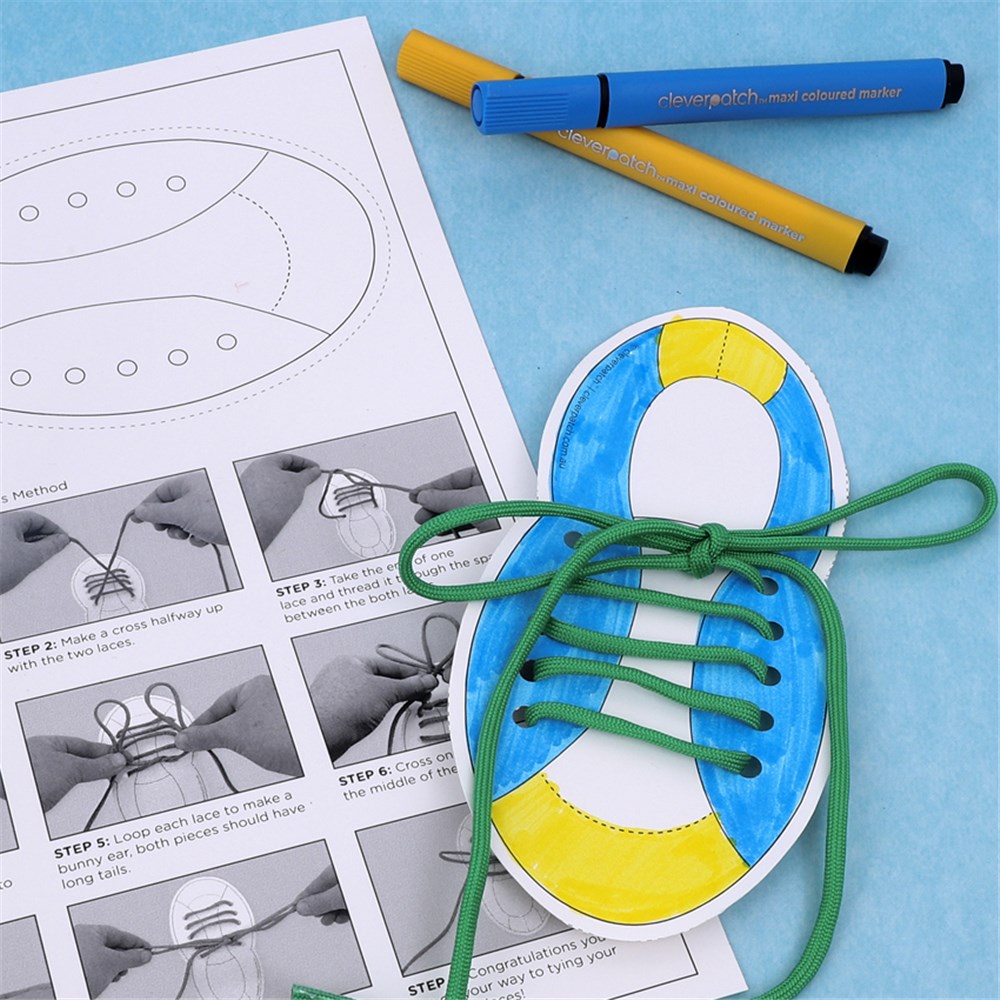
- Practice on a Practice Board or Old Shoe: Before tackling shoes on their feet, use a dedicated practice board, a cutout cardboard shoe, or an old shoe. This allows children to manipulate the laces without the pressure of having the shoe on their foot.
- Use Colorful Laces: Start with two different colored shoelaces for practice. This helps children differentiate between the left and right lace, making instructions much clearer.
- Break It Down: Don't expect perfection overnight. Break each method into tiny, manageable steps. Celebrate each successful step, no matter how small.
- Use Storytelling and Fun Analogies: Beyond "bunny ears," invent your own stories. Maybe the laces are "snakes" that have to "kiss" and "hug."
- Practice Regularly, But Keep It Short: Short, consistent practice sessions (5-10 minutes) are far more effective than long, frustrating ones.
- Address Common Mistakes: Children often pull too hard or too loosely, or forget which way to loop. Gently correct and guide them, reinforcing the correct motions.
- Provide Encouragement and Praise: Positive reinforcement is crucial. Acknowledge their effort and progress, which builds confidence and willingness to keep trying.
- Consider Alternative Lacing: For children who struggle significantly, consider elastic laces, speed laces, or even slip-on shoes as a temporary alternative while they continue to practice shoelace tying methods for children at their own pace.

")


