How to Replace a Broken Notebook Screen at Home: A Comprehensive DIY Guide
Saving money and extending the life of your notebook doesn't have to mean sacrificing its original functionality. With the right tools and knowledge, you can perform a notebook screen replacement at home, saving you time and money in the long run.
Why Replace Your Notebook Screen at Home?
- Save money: Professional notebook screen replacement can cost anywhere from $99-$249 (parts + labor). With a DIY approach, you can purchase the replacement screen for $40-$120.
- Reduce e-waste: Repairing your notebook instead of replacing it with a new one helps minimize electronic waste and contributes to sustainable practices.
- Gain technical knowledge: Performing a DIY notebook screen replacement at home teaches you about your device's internal workings and allows you to troubleshoot minor issues in the future.

Moving forward, it's essential to keep these visual contexts in mind when discussing Notebook Screen Replacement At Home.
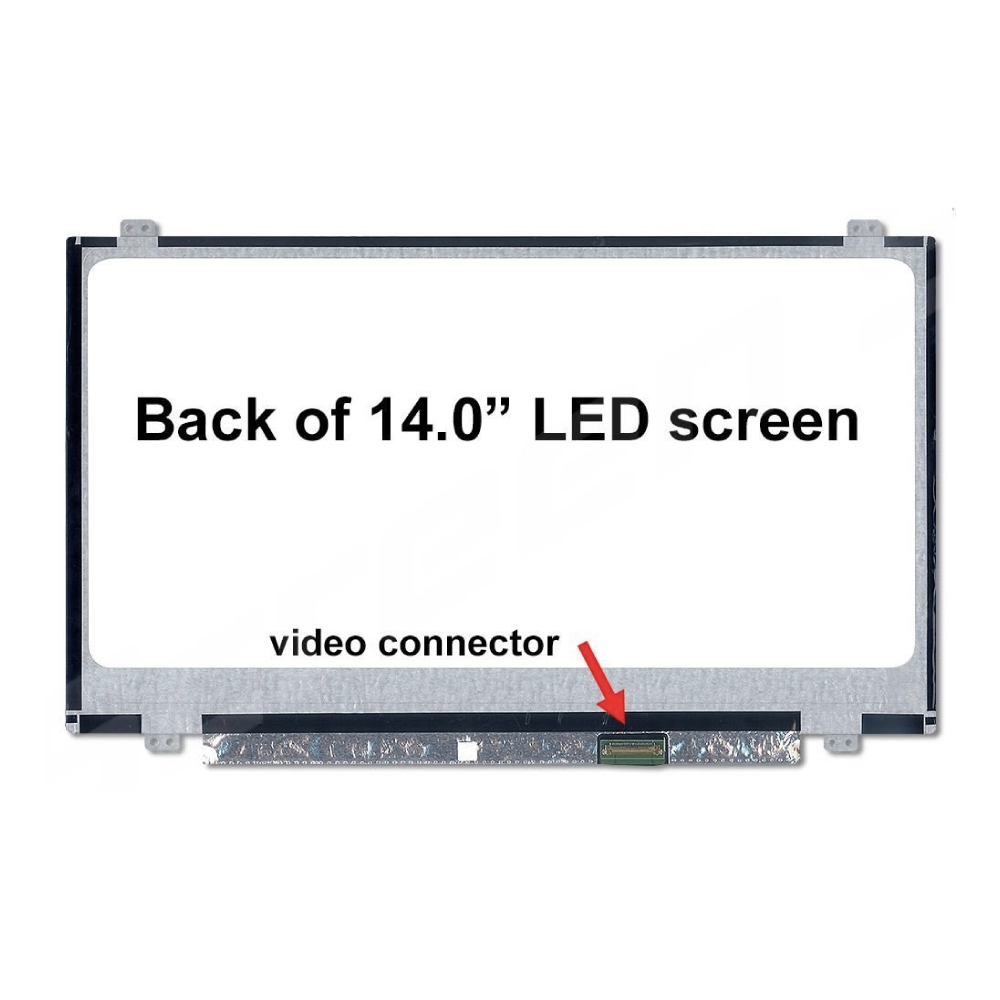
Preparation and Tools Needed Before Starting the Replacement
Before embarking on the replacement process, make sure you have the necessary tools and equipment:
- A compatible replacement screen (check your notebook model and screen resolution for compatibility)
- A small Phillips-head screwdriver
- A plastic spudger (for gently prying apart panels)
- A set of Torx screws (for some notebook models)
- A soft cloth for cleaning

Steps for Notebook Screen Replacement at Home
Replacing a notebook screen can be a daunting task, but breaking it down into manageable steps makes it more accessible:
- Shut Down Your Notebook: Completely power off your notebook to prevent any accidental startup during the replacement process.
- Remove the Battery and Accessories: Take out the battery and any other detachable components, such as the DVD drive or wireless cards.
- Disconnect the Screen Cables: Locate the screen cables and disconnect them from the motherboard. Be careful not to damage any of the cables or connectors.
- Remove the Screen Bezel: Use a plastic spudger to gently pry apart the screen bezel from the notebook's chassis. Be cautious not to apply too much pressure, which can damage the screen or surrounding components.
- Remove the Screen Hinges: Take out the screws holding the screen hinges and carefully lift them off the notebook's frame.
- Remove the Old Screen: Carefully lift the old screen out of the notebook's chassis, taking note of any cables or connectors that may still be attached.
- Install the New Screen: Place the new screen onto the notebook's chassis, ensuring it's properly aligned with the screen bezel and hinges. Reattach any cables or connectors you removed during the old screen's removal.
- Reassemble the Notebook: Reattach the screen hinges, followed by the screen bezel. Reconnect the screen cables to the motherboard.
- Turn On Your Notebook and Test the New Screen: Carefully boot up your notebook and verify that the new screen is working correctly.
Final Thoughts and Considerations
- Your notebook's warranty may be voided if you attempt to repair it yourself.
- If you're not comfortable with technical procedures or have limited experience with DIY repairs, it's always best to consult a professional.
- Be sure to purchase a compatible replacement screen that matches your notebook's original screen size and resolution.
By following this comprehensive guide, you'll be able to confidently replace your notebook screen at home and extend the life of your device.


 - HP")


